 Another new addition to NXT-G 2.0 (the software that comes packed with LEGO MINDSTORMS NXT 2.0) is the Sound Editor Here is a quick guide to its functionality;
Preliminary Actions
Open NXT-G 2.0
Installed a computer Microphone correctly, and can confirm it works by using the Sound Recorder found in Start/Programs/Accessories/Sound Recorder (Example of the Windows 7 Sound Recorder below - you will be able to tell if you are recording if the green bar next to the time is moving).

The Sound Editor
The Sound Editor can be located under the 'Tools/Sound Editor...' menu in the software package.
The Sound Editor can be located under the 'Tools/Sound Editor...' menu in the software package.
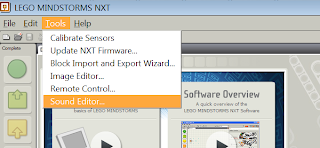
 Click on this menu option to run the Sound Editor. You will know it is loading if the image on the left appears in the middle of your screen.
This window will appear - welcome to the Sound Editor!
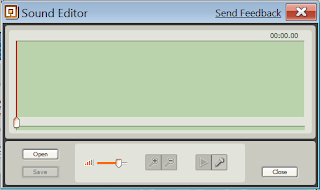
Below is an annotated screenshot of the Sound Editor window:
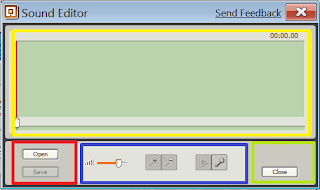 Yellow Box; The Waveform table. When you are recording waves will appear that show the peaks and and lows of noise level against the time taken for your recording.
Red Box: This is where the 'Open' and 'Save' options can be accessed. You can open and save in the following formats:
-.RSO
-.WAV
-.MP3
Blue Box: This is where we can change the playback volume of our recording (Only effects the volume level when played back on your PC, and not the overall volume when played back on your NXT brick), zoom in and out of the waveform table (For precise cropping of your recording), and where we can start, stop and play our recording
Green Box: This is where we can close the Sound Editor. Make sure you save before closing.
Recording and Cropping
The Sound Editor will allow you to record for up to ten seconds, of which you will have to crop your wanted sound to under five seconds. while you are recording, the sound Editor will look something like this:
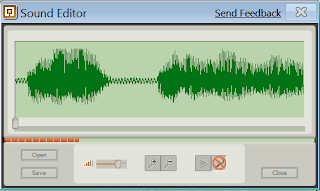 The red and white striped bar below the waveform table shows you how long you have been recording for, and how long you have left (approximately). Also, the recording icon will now have a red circle with a line through it, and its' function will change to 'stop recording'.
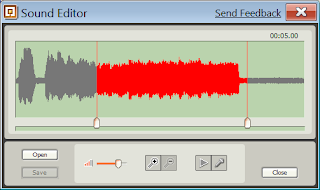
Crop your recording by dragging the two dividers found just below the waveform table to the beginning and end of your wanted selection. The same applies when you have imported a sound. An easy way to tell if you need to crop your recording is if the waves in the wavelength table are red. If your recording is of an acceptable length, the waves will be green, (See pictures below) and the 'Save' function will become active.

Zooming in and Out
Zooming in and out of the waveform table is a great way to help crop a file more precisely. Use the zoom keys (the magnifying glasses) to achieve this. At the standard zoom setting (when you open the Sound Editor) you can move the cropping dividers roughly along every two seconds of recording. When you zoom in, you can move the divider along every one second, achieveing a more accurate selection.
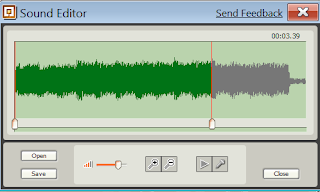
When you zoom in, the waveform table will keep the recording between the dividers in view.


1 comment:
excellent reviews -- can't wait to get my license of NXT-g 2.0
Post a Comment